Installing from the latest release (Windows)
Windows support in Rayhunter's installer is a work-in-progress. Depending on the device, the installation instructions differ.
TP-Link
- Insert a FAT-formatted SD card. This will be used to store all recordings.
- Connect the device via WiFi or USB Tethering -- you should be able to view the TP-Link admin page on http://192.168.0.1.
- Download the latest release (must be at least 0.3.0) for windows-x86_64, and unpack the zipfile.
- Open PowerShell or CMD in that extracted folder, the installer:
./installer tplink - Follow the instructions on the screen, if there are any.
Orbic
The Windows USB installer is known to be buggy. We strongly recommend using the Network-based installer.
-
Connect the device to your computer using the provided USB cable.
-
Install the Zadig WinUSB driver installer.
-
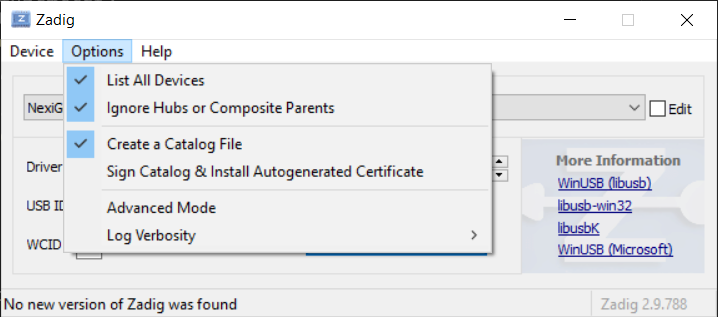
Open Zadig, click options->show all devices
-
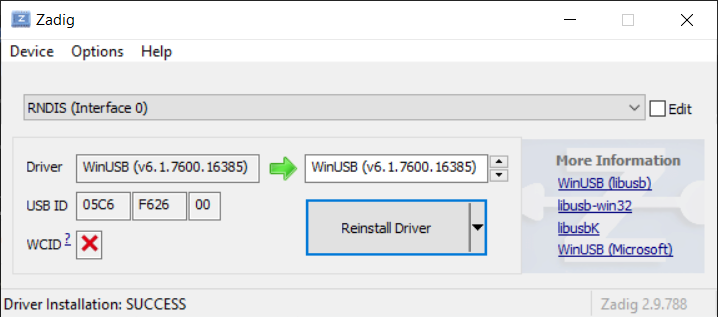
Select 'RNDIS (Interface 0)'
-
Click 'install driver' and wait for it to finish.
-
Download the latest
rayhunter-vX.X.X-windows-x86_64.zipfrom the Rayhunter releases page. The version you download will have numbers instead of X -
Unzip
rayhunter-vX.X.X-windows-x86_64. -
Open a powershell terminal by pressing Win+R and typing
powershelland hitting enter. -
Type
cd ~\Downloads\rayhunter-v<x.x.x>-windows-x86_64(Replace <x.x.x> with the Rayhunter version you just unzipped) and hit enter. -
Run the install script:
.\installer.exe orbicand hit enter.- The device will restart multiple times over the next few minutes.
- You will know it is done when you see terminal output that says
checking for rayhunter server...success!
-
Rayhunter should now be running! You can verify this by following the instructions below to view the web UI. You should also see a green line flash along the top of top the display on the device.